PAROL6 Commander GUI
Community GUIs
Experimental kinematics branch
You can use Experimental kineamtics branch which resolves most Cartesian jogging errors but introduces potentially dangerous conditions. Use experimental kinematics branch at your own risk, as it may damage the robot! Main branch is safe.
COMMUNITY MADE WEB GUI
Another GUI version is avilable that is made by our discord community members: PAROL6 WEB commander use at your own risk!

Fig — Community made Web GUI
Commander software Guide
When you start the PAROL6 commander software, you will see two windows:
- Commander window
- Simulator window

Fig — Commander window
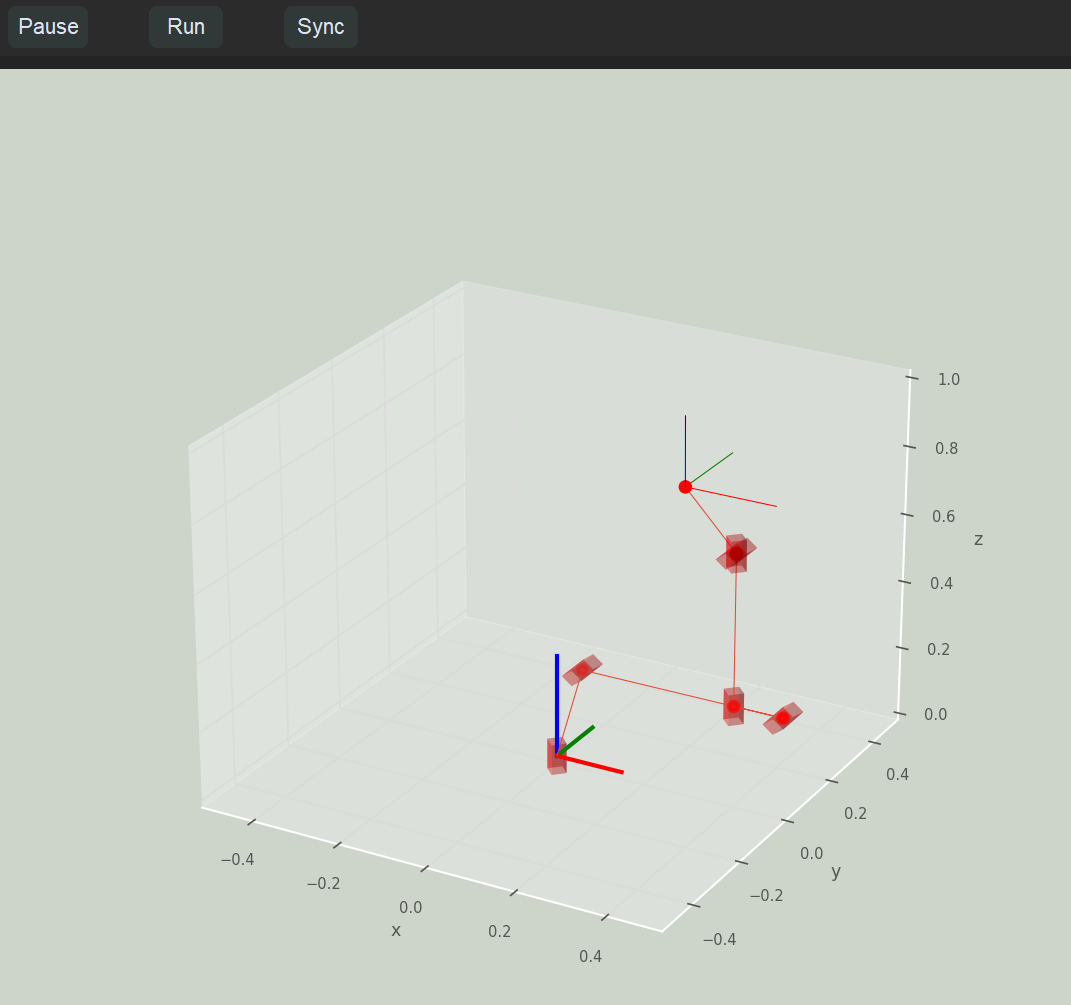
Fig — Simulator window
The commander window is used to jog the robot, read logs, write programs, and home the robot. The simulator window shows the robot's live position in 3D.
Note
The simulator only works when your robot is connected.

Fig — Connection bar
At the bottom of the commander software window, you will see an entry bar and a Connect button.
In the field next to the Connect button, enter your serial COM port:
- Windows: enter
COMx(wherexis your COM port number) - Linux: enter
ttyACMx(wherexis your COM port number)
The Clear Error button has the same function as the Enable button.
The Sim and Real Robot buttons have no function at the moment.

Fig — Cartesian jog
Cartesian jog is used to move the robot in Cartesian space. You can use the TRF (Tool Reference Frame) or WRF (World Reference Frame). TRF uses axes relative to the end effector, while WRF uses axes relative to the robot base.
Note
When jogging in Cartesian mode, you may encounter singularities. See the General Concepts section for more information.
Fig — Joint jog
Joint jog is used to jog individual motors. Left is the positive direction; right is the negative direction.
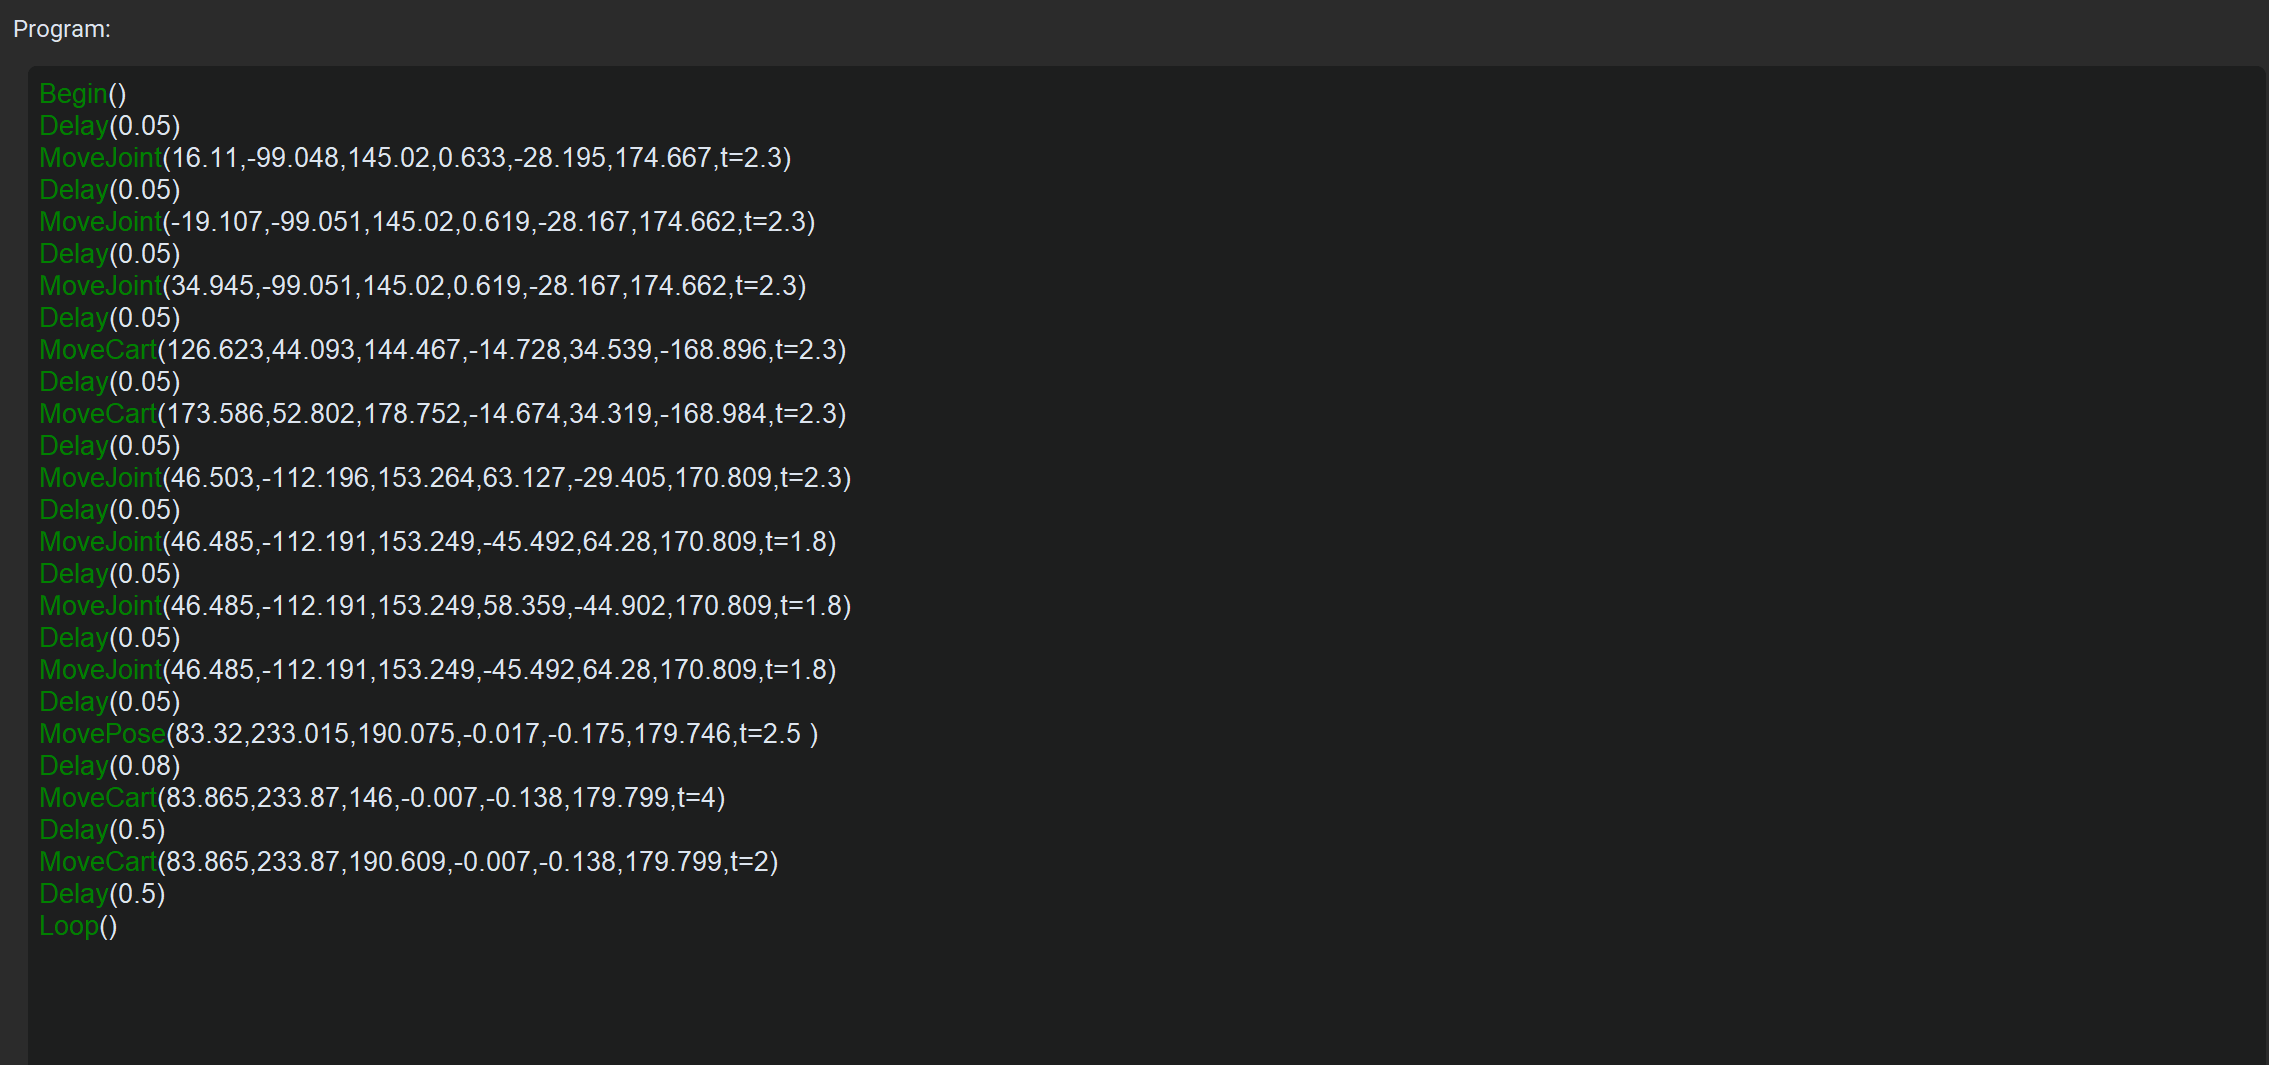
Fig — Program window
This window allows you to write robot scripts. See the Software section for more details.

Fig — Start/stop tab
Press Start to begin program execution. Press Stop to halt it.
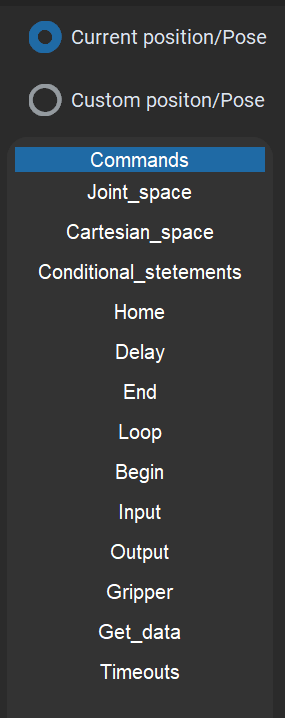
Fig — Commands window
This window lets you select commands and click to add them to the program window. Movement commands that use the current position or pose (such as MoveJoint, MovePose, SpeedJoint, MoveCart, MoveCartRelTRF, SpeedCart) will automatically insert the current pose or joint position as arguments. Custom position/pose commands will not add any values.

Fig — Response log
The response log shows error logs and active commands.
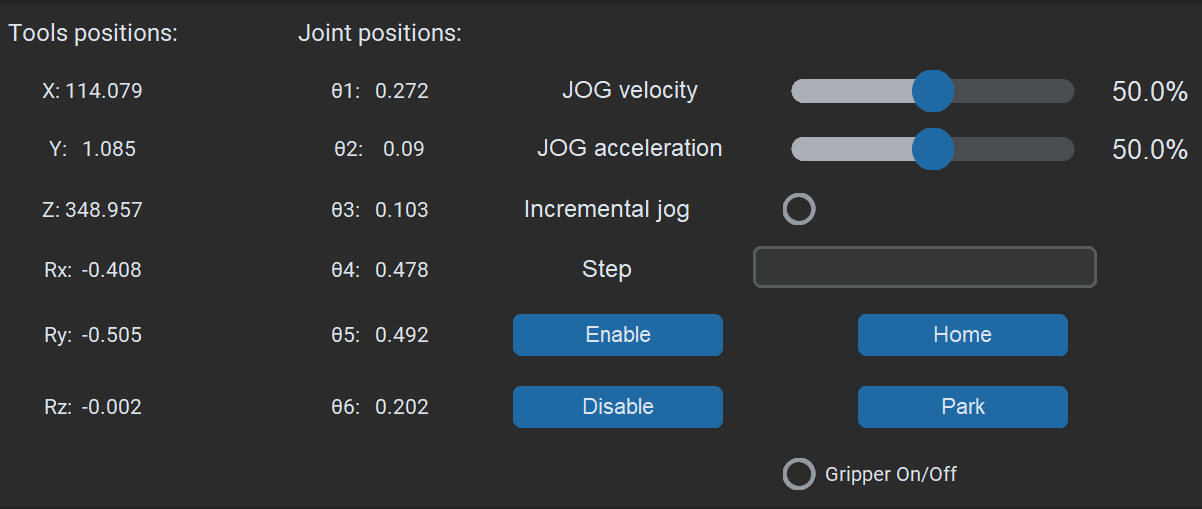
Fig — Robot position
Here you can see the robot's joint positions and the end-effector position in Cartesian space. Use the slider to adjust joint and Cartesian velocity. The Home button starts the homing sequence. The Enable button clears all errors and enables the robot for operation. Disable disables the robot.
Everything described above is located in the Move menu. All other menus keep the same layout — only the jog menus are replaced with different content.

Fig — IO tab
Here you can check the state of your inputs and set the desired state of your outputs.
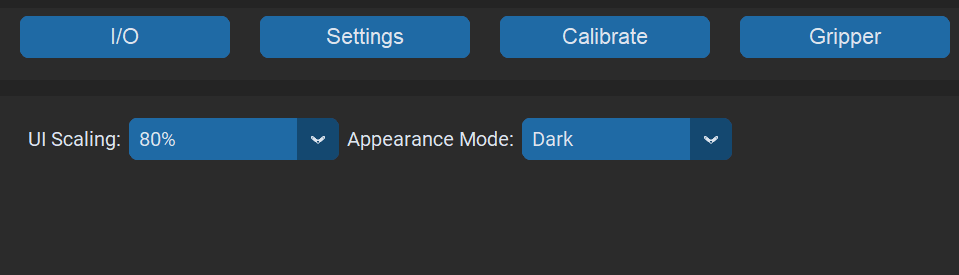
Fig — Settings tab
Here you can switch the GUI between dark and light mode, and adjust scaling to fit your display.
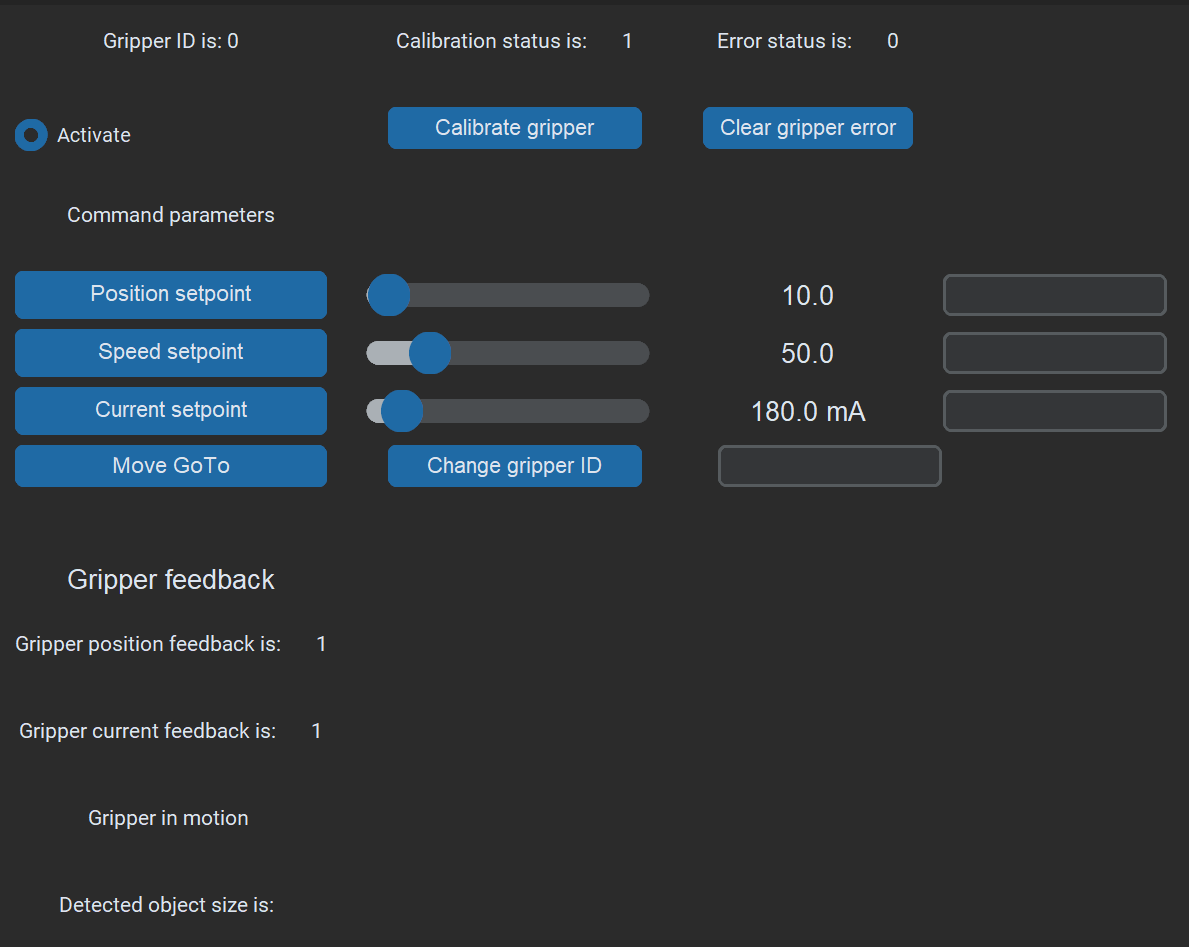
Fig — Gripper tab
Here you can control and configure your gripper.
- After homing the robot, press Calibrate Gripper. The gripper will start to move and its status will change to Calibrated.
- Press Clear Gripper Error.
- Use the sliders to set the desired position, speed, and torque, then press Move GoTo.
Under Gripper Feedback, you can see gripper current, position feedback, and status (in motion, object detected, etc.).